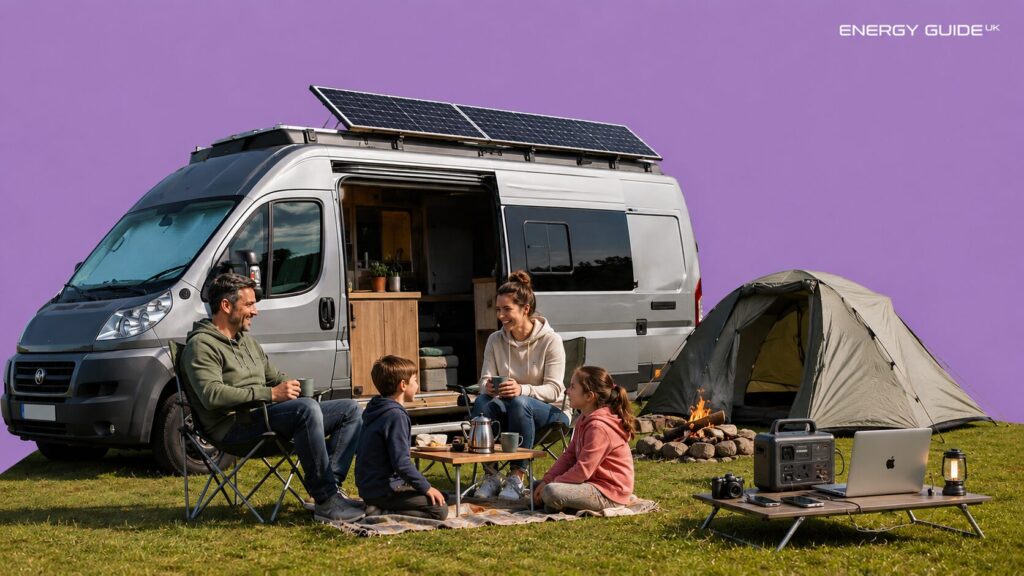
The best solar panels for a campervan can provide you with the power you need to live off-grid, whether you’re embarking on an extended camping trip, boondocking, or living freely in the wild.
Solar panels offer huge potential to boost energy independence. They’re among the lowest-cost, most popular forms of power generation that you can rapidly deploy in various ways, including in campervans. More people are generating their own power, with data showing there were over 2 million solar installations across the UK by the end of March 2026.
Solar technology has become smaller, lighter, more affordable, and more effective in low-light conditions than it was even five years ago. These matter enormously for campervan applications, where roof space is limited, weight is a consideration, and British weather is rarely the cloudless Mediterranean idyll that solar marketing tends to imply.
Getting solar panels for a campervan right comes down to knowing how much power your daily life on the road actually demands, choosing the right panel type and technology for your roof and usage pattern, and understanding the charge controller and battery setup that turns the power your panels generate into electricity you can actually use. Get all three right, and you can make your van genuinely self-sufficient.
Best Solar Panels for a Campervan: At a Glance
1. Best Overall Rigid Panel – Renogy N-Type 200W Monocrystalline
2. Best for Partial Shade – Renogy ShadowFlux 200W
3. Best Budget Rigid Panel – ECO-WORTHY 200W Monocrystalline
4. Best Premium Panel – Victron BlueSolar 175W Monocrystalline
5. Best Flexible Panel – Renogy 200W Flexible Monocrystalline
6. Best Portable Panel – Jackery SolarSaga 100W Bifacial
The Best Solar Panels for a Campervan UK: Our Top Picks
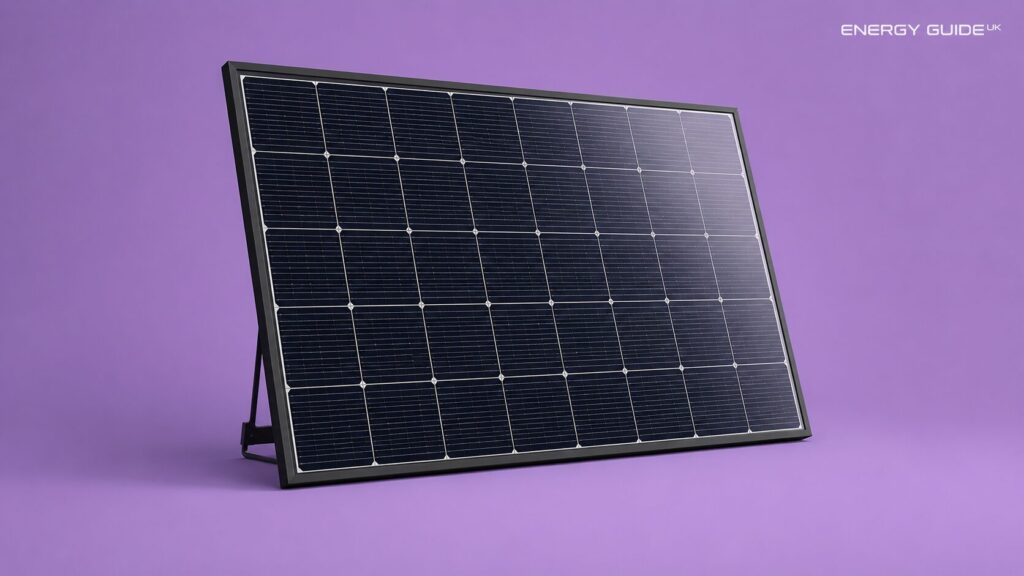
Best Overall Rigid Panel: Renogy N-Type 200W Monocrystalline
- Wattage: 200W
- Cell type: N-Type monocrystalline
- Efficiency: 25%
- Weight: Approximately 8.5 kg
- Warranty: 25 years power output, 5 years workmanship
- Price: From £145
The Renogy N-Type 200W delivers 25% cell efficiency, is 7.5% smaller and 11.7% lighter than previous 200W PERC panels, and maintains peak performance for 25 years through reduced hot spots and micro-crack resistance. The low temperature coefficient of -0.29%/°C means it handles the elevated roof temperatures of a summer campervan better than panels with a higher coefficient, which is a genuine real-world benefit on a van roof with limited airflow.
Pre-drilled mounting holes, an IP65 junction box, and MC4 connectors make installation straightforward. At around £0.72 per watt, it’s the strongest value proposition for N-Type technology in the UK campervan market. For most van builds on a flat or near-flat roof, this is the right starting point.
Best for: Full-time van life, flat roofs with mounting brackets, and builds prioritising maximum output and long-term durability.
Best for Partial Shade: Renogy ShadowFlux 200W
- Wattage: 200W
- Cell type: Monocrystalline PERC with anti-shading technology
- Efficiency: 22%
- Warranty: 25 years power output, 5 years workmanship
- Price: From £206
The ShadowFlux is one of Renogy’s best solar panels for motorhomes and campervans, and it earns that position through its cell-level shading management. A standard panel that loses 30% of its area to shading from a roof rack bar or an overhanging tree effectively becomes a 140W panel. The ShadowFlux maintains significantly more of its rated output under the same conditions, making it the practical choice for any van whose roof isn’t perfectly unobstructed.
Best for: Vans with roof racks, antennas, skylights, or anyone who regularly parks beneath trees or in dappled shade.
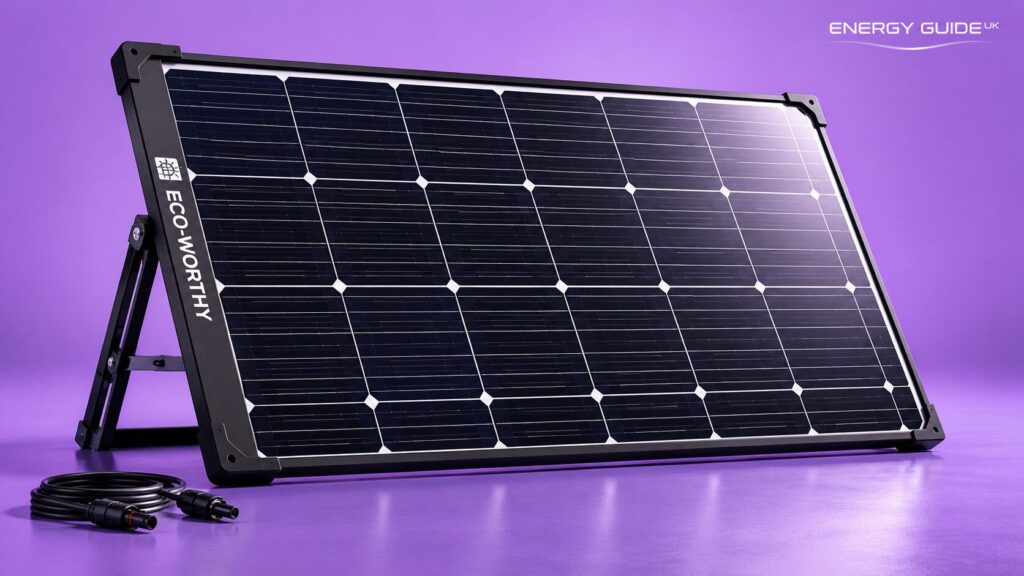
Best Budget Rigid Panel: ECO-WORTHY 200W Monocrystalline
- Wattage: 200W
- Cell type: Monocrystalline
- Efficiency: 21%
- Weight: Approximately 10 kg
- Warranty: 5 years product, 25 years power output
- Price: From £80
ECO-WORTHY is one of the three most recommended brands for motorhome and campervan solar in the UK market. Its rigid monocrystalline panels consistently deliver for builders who need solid performance at the lowest possible upfront cost. At around £0.40 per watt, the ECO-WORTHY 200W is significantly cheaper than equivalent panels, but the trade-off is slightly lower efficiency (21% vs 25%) and a heavier frame.
For a van build where budget is the primary constraint and roof space isn’t limited, ECO-WORTHY offers a reliable, warrantied panel that will charge a leisure battery effectively for years. It’s also widely available through Amazon UK with fast delivery, which matters for builders working to a build schedule.
Best for: Budget-conscious builds, first solar installations, buyers who need reliable performance without premium pricing.
Best Premium Panel: Victron BlueSolar 175W Monocrystalline
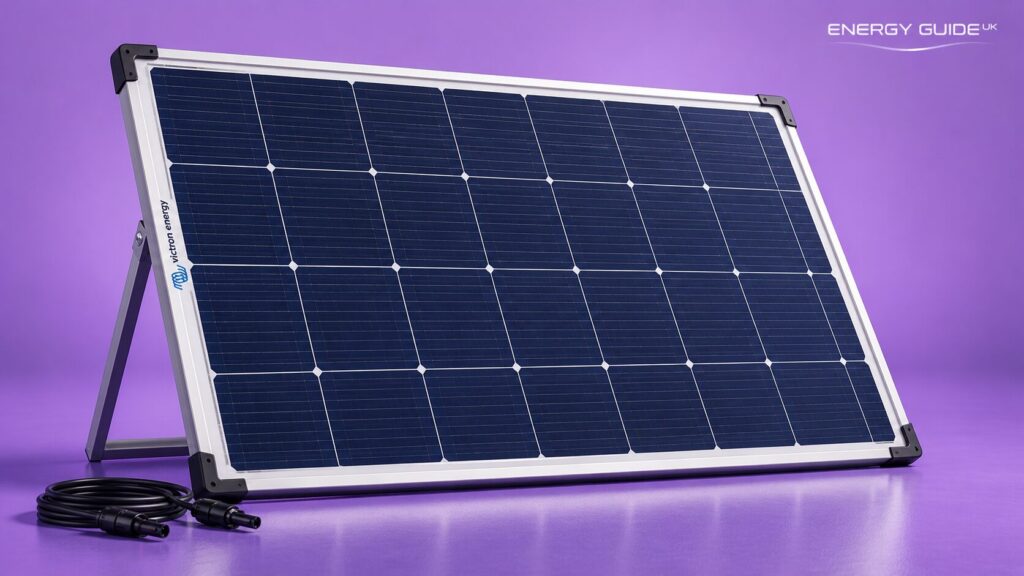
- Wattage: 175W
- Cell type: Monocrystalline
- Efficiency: 19.6%
- Weight: Approximately 12.5 kg
- Warranty: 5 years product, 25 years power output
- Price: From £220
Two 175W Victron rigid panels, paired with a Victron SmartSolar MPPT controller and a 200Ah LiFePO4 battery, are the benchmark real-world UK van setup. They can provide all the power you need in summer, and harvest 200 to 400 Wh on overcast Welsh days in winter, enough to keep the battery charged through an overnight stay.
Victron’s panels are heavier and more expensive per watt than Renogy or ECO-WORTHY equivalents. Still, they’re built to the same exacting standards as Victron’s charge controllers and battery systems, meaning the whole installation integrates seamlessly if you’re building around the Victron ecosystem. Victron panels keep the system coherent and simplify future troubleshooting in builds where the priority is long-term reliability, and you’re already specifying a Victron MPPT controller.
Best for: Premium builds, full Victron ecosystem integration, buyers prioritising long-term reliability over upfront cost efficiency.
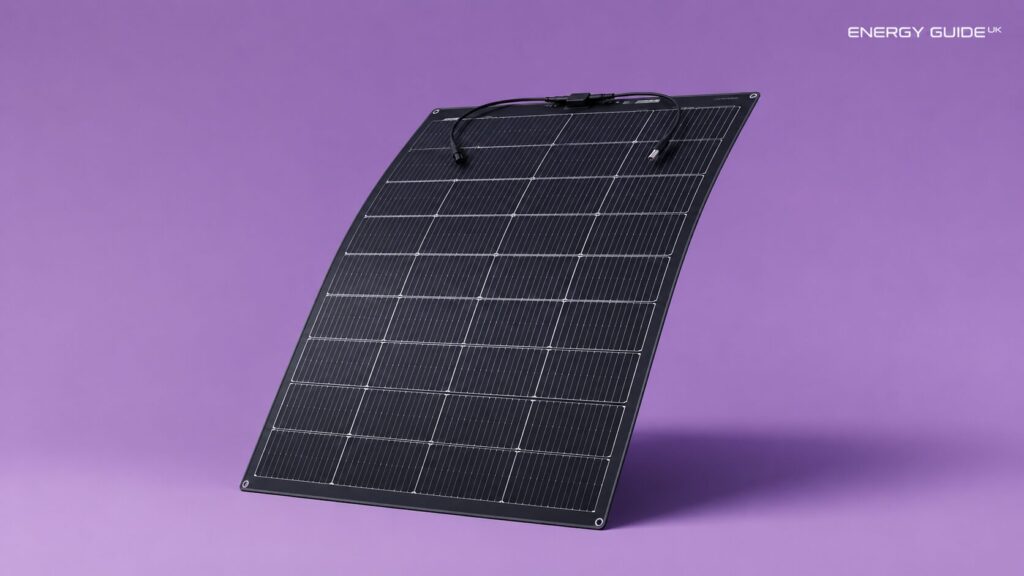
Best Flexible Panel: Renogy 200W Flexible Monocrystalline
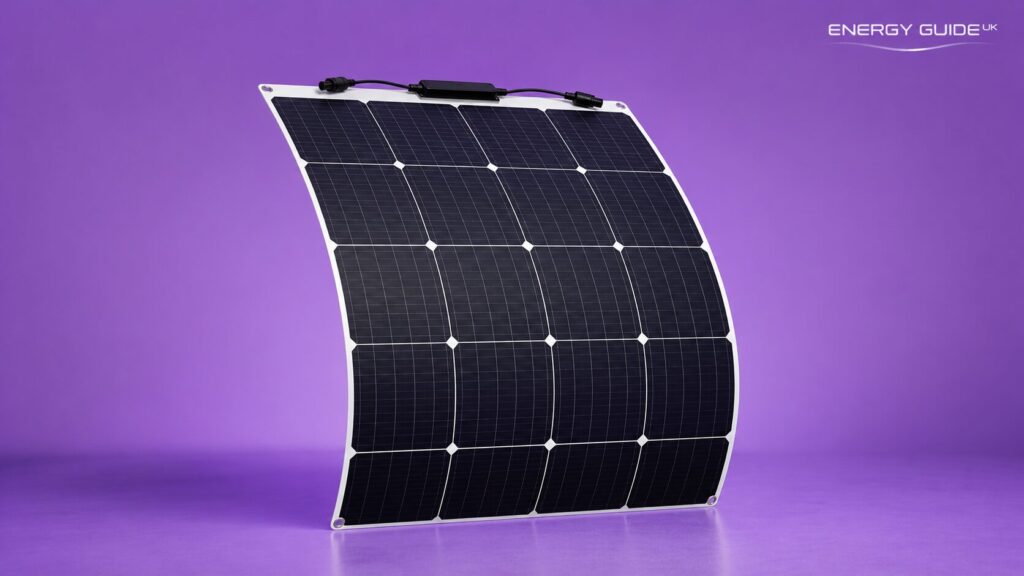
- Wattage: 200W
- Cell type: Monocrystalline PERC with ETFE surface
- Efficiency: 22%
- Weight: Approximately 3.6 kg
- Bendability: Up to 240°
- Warranty: 25 years power output, 5 years workmanship
- Price: ~£153
The Renogy 200W flexible panel is bendable up to 240°, maintains over 80% output efficiency after 25 years, and weighs 50% less than a rigid equivalent. This makes it the right choice for curved roofs where a rigid frame won’t sit flat. Its ETFE surface is harder and more scratch-resistant than standard PET flexible panels, extending its working life on a van roof subject to road vibration and temperature cycling.
A bonded flexible panel produces approximately 10 to 15% less in real-world UK conditions than an air-gapped rigid panel of the same wattage, so factor in 170 to 180W of effective output in your sizing calculation rather than the full 200W.
Best for: Curved roofs, stealth builds, anyone who can’t or won’t drill, weight-sensitive conversions.
Best Portable Panel: Jackery SolarSaga 100W Bifacial
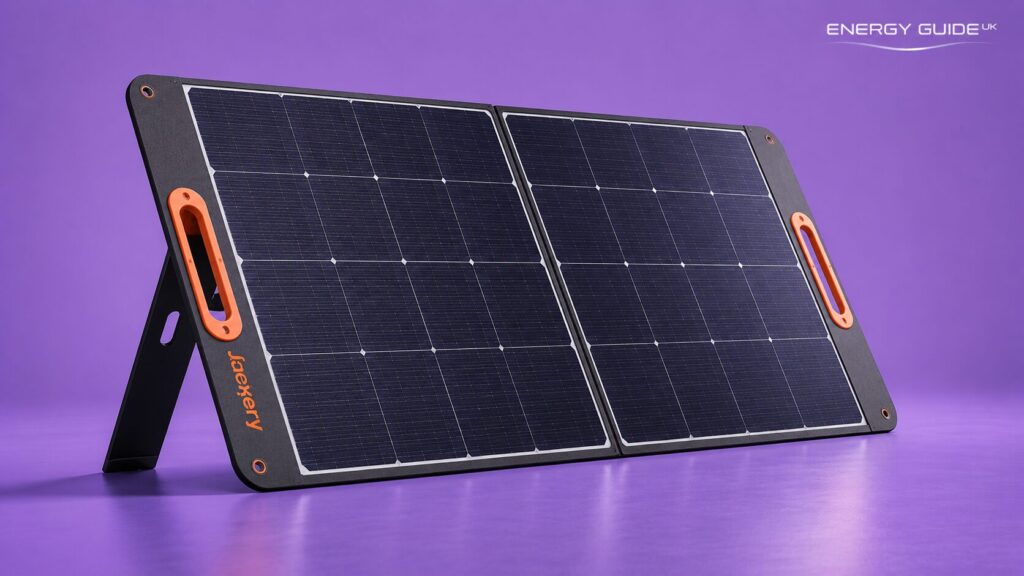
- Wattage: 100W
- Cell type: Monocrystalline bifacial
- Efficiency: Up to 24%
- Weight: Approximately 4.5 kg (folded)
- Price: ~£180
The Jackery SolarSaga 100W Bifacial’s dual-sided design and higher conversion efficiency make a real difference when squeezing every watt from limited space. It sets up in seconds with sturdy kickstands, and its splash-proof build handles rain and dust without issue, which is a genuine advantage in UK weather.
The bifacial design captures reflected light from the ground surface beneath the panel on the rear cells. It’s most useful on pale surfaces such as a light-coloured campsite road or a sandy beach, where the reflected-light gain can reach 5-15%. On dark grass or tarmac, the rear cell contribution is minimal, but the front cells are genuinely high-performing.
The portable kickstand design lets you angle the panel directly at the sun regardless of the van’s orientation, recovering the output that a fixed, flat-mounted panel loses when the van isn’t facing south. Its compatibility with Jackery power stations makes it a natural choice for anyone already in the Jackery ecosystem, and its compact folded size makes daily deployment and storage manageable for weekend-use vans.
Best for: Weekend trips, Jackery power station users, anyone who wants no-installation portable solar with above-average efficiency.
Best Solar Panels for a Campervan Comparison Table
| Product | Type | Wattage | Efficiency | Best For | Price (May 2026) |
| Renogy N-Type 200W | Rigid mono | 200W | 25% | Most van builds, best value | ~£145 |
| Renogy ShadowFlux 200W | Rigid mono | 200W | 22% | Partial shade, roof obstructions | ~£206 |
| ECO-WORTHY 200W Rigid | Rigid mono | 200W | 21% | Tightest budgets | ~£80 |
| Victron 175W BlueSolar | Rigid mono | 175W | 19.6% | Premium builds, Victron ecosystem | ~£220 |
| Renogy 200W Flexible | Flexible mono | 200W | 22% | Curved roofs, stealth builds | ~£153 |
| Jackery SolarSaga 100W Bifacial | Portable | 100W | 24% | Weekend use, portable power | ~£180 |
How Much Do Solar Panels for a Campervan Cost in the UK?
The most common budgeting mistake in campervan solar is pricing the panel and assuming that’s the system cost. The panel typically accounts for 30 to 40% of total spend. The charge controller, battery, cabling, connectors, mounting hardware, and, if you’re going professional, installation labour make up the rest.
Panel Cost Only vs Full System Cost
A 100W rigid monocrystalline panel costs approximately £80-£120. A 200W-equivalent unit costs £100- £200, depending on the brand and cell technology. Those figures represent only the panel. A working solar system requires everything else listed in the table below.
Full Campervan Solar System Cost Table:
| Component | Budget Option | Mid-Range Option |
| 100W monocrystalline panel | £80 | £120 |
| 200W monocrystalline panel | £100 | £145 |
| MPPT charge controller (10–15A) | £50 | £80 |
| 100Ah AGM leisure battery | £80 | £120 |
| 100Ah LiFePO4 leisure battery | £150 | £250 |
| Cabling, fuses and connectors | £20 | £50 |
| Cable entry gland and sealant | £10 | £20 |
| Mounting hardware (Z-brackets) | £15 | £30 |
| Total — 100W panel, AGM battery, DIY | ~£255 | ~£420 |
| Total — 200W panel, LiFePO4, DIY | ~£345 | ~£575 |
| Add for professional installation | £150 | £400 |
Real-World System Cost Examples
Weekend Build — 100W Rigid Panel, 100Ah AGM Battery, DIY Installation
The entry-level system for a weekend van is usable from April to October. Covers phone charging, LED lighting, and a small cool box comfortably in summer, but is insufficient for a compressor fridge year-round.
A professionally installed 100W rigid panel system with 110Ah AGM battery on a VW T5 conversion costs approximately £420 total, including components and fitting, but excluding any battery upgrade. DIY installation reduces this to approximately £255-£280, depending on component brands.
Extended Trips Build — 200W Rigid Panel, 100Ah LiFePO4 Battery, DIY Installation
The right setup for a van used for one to two-week trips with a 12V compressor fridge. Covers fridge, lighting, laptop, and phone charging in the UK summer. Needs supplementary alternator charging in winter. Total component cost is approximately £345-£575 DIY, depending on the brand tier. Add £150 to £400 for professional installation.
Full-Time Van Life Build — 400W Panel Array, 200Ah LiFePO4 Battery, DIY Installation
Two 200W rigid panels, a 30A MPPT controller, and a 200Ah LiFePO4 battery. Covers most full-time UK van life power needs in summer and provides meaningful reserve capacity in winter when combined with alternator charging. The total component cost is approximately £750-£1,200 DIY. Professional installation for a system this size typically costs £300-£500 on top of the components.
The Lithium vs AGM Cost Decision
At the component level, a 100Ah LiFePO4 battery costs approximately £80-£130 more than a 100Ah AGM battery. Over a 10-year van life, the AGM will need replacing every three to five years, two or three times in the same period, while a LiFePO4 battery lasts 3,000 to 5,000 cycles, or 8 to 15 years in typical use. The total cost of ownership over a decade strongly favours lithium once replacement costs are factored in, particularly for any van used more than a few weekends per year.
Professional Installation Costs
Professional solar panel kit installation for a campervan starts at approximately £595 for supply and fit, covering panel supply, an MPPT controller, professional mounting, all wiring, cable management, and a full handover. For a labour-only fit on components you’ve supplied yourself, expect to pay £150 to £400, depending on system complexity and the installer’s day rate.
For anyone uncomfortable with electrical work, or whose insurer requires sign-off, professional installation represents good value compared with the cost and consequences of a wiring fault. It also provides a competent person’s certification that some insurers require for van conversions used as a permanent residence.
How Much Power Do Solar Panels for a Campervan Actually Generate in the UK?
The wattage printed on a solar panel, like 100W, 200W, or 400W, is measured under Standard Test Conditions: 25°C, clear sky, and 1,000 watts of solar irradiance per square metre. The UK occasionally meets those conditions in July. For the other eleven months of the year, your panel will produce considerably less.
Rated Wattage vs Real-World UK Output
In practice, a 100W panel in the UK generates approximately 40-60W on a good winter day and 70-90W in summer. A 200W panel generates roughly 80-120W in winter and 140-180W in summer. Size your system based on real-world figures, and you’ll have enough power, but if you only look at the sticker, you’ll run out of charge by mid-afternoon in November.
The gap between rated and real-world output comes down to two factors. First, the UK’s solar irradiance rarely hits 1,000W/m². On a typical overcast British day, it’s closer to 200 to 400W/m², which is where your panel will spend most of its operating life. Second, solar panels lose efficiency as they heat up. A panel mounted directly on a van roof with no air gap can run 20 to 30°C hotter than ambient temperature in summer, reducing output by 10 to 20%.
UK Peak Sun Hours by Season
A peak sun hour is one hour of sunlight at exactly 1,000W/m² irradiance, the standard unit against which panel output is measured. The UK averages around 2.8 to 3.5 peak sun hours per day in summer and just 0.8 to 1.5 in winter. These figures vary significantly by location, with the south-west of England getting substantially more than Scotland, and coastal areas often outperforming inland locations. Check out the sunshine hours map to understand your local sunshine exposure.
The table below shows what a 100W and 200W panel will realistically generate across the seasons in typical UK conditions:
| Season | Peak Sun Hours/Day | 100W Panel Output | 200W Panel Output |
| Summer (Jun–Aug) | 3.0 to 3.5 | 70 to 90Wh/day | 140 to 180Wh/day |
| Shoulder (Apr–May, Sep–Oct) | 2.0 to 2.8 | 50 to 70Wh/day | 100 to 140Wh/day |
| Winter (Nov–Mar) | 0.8 to 1.5 | 20 to 50Wh/day | 40 to 100Wh/day |
If you plan to use your campervan year-round, size your system around the winter figures. A system may comfortably cover your needs in June but struggle to keep up in January, when a warm campervan with working lighting matters most.
What This Means for Van Life in the UK
For a weekend campervan user heading out from April to October, a 100W to 150W panel is typically sufficient for phone charging, LED lighting, and a small cool box. For anyone travelling in winter or living in their van full-time, 200W or more is the realistic minimum, and even then, you’ll need battery reserves to bridge the shorter days and lower irradiance.
Solar battery storage is vital for UK campervan solar. Your panel charges the battery when the sun cooperates, and the battery powers the van when it doesn’t. Getting both sized correctly, not just the panel, is what separates a system that works from one that leaves you cold and dark on a grey February morning.
How Many Solar Panels Does a Campervan Need? Calculate Your Power Requirements
The most common mistake in campervan solar is choosing solar panel sizes based on what fits on the roof rather than what the van actually needs. Your roof space sets the maximum, your daily power consumption sets the minimum.
Use the calculator below to work out the panel wattage your van requires, then figure out how to fit it.
Campervan Solar Panel Calculator
Enter your daily appliance use to estimate the solar panel wattage your campervan needs.
| Appliance | Watts | Hours/Day | Wh/Day |
|---|
Total Daily Use: 0 Wh
With 20% System Losses: 0 Wh
Recommended Solar Panel Size: 0 W
Quick-Reference Guide: Panel Size by Use Case
If your situation matches one of the descriptions below, use these as a starting point:
| Use Case | Typical Daily Wh | Recommended Panel Size |
| Weekend trips (phone, lights, small cool box) | 150 to 300Wh | 100 to 150W |
| Extended trips (fridge, laptop, lights, fan) | 500 to 900Wh | 200 to 300W |
| Full-time UK van life (all above, year-round) | 800 to 1,200Wh | 400W+ |
| Motorhome with heating controls and TV | 1,000 to 1,500Wh | 500W+ |
These figures assume average UK solar conditions and a battery bank sized to provide two to three days of reserve. If you’re using much more power than your panels generate, which is common in winter, you’ll need a larger battery bank or a secondary charging source, such as a split charge relay from the van’s alternator.
Types of Solar Panels for a Campervan: Rigid, Flexible and Portable
Choosing the right panel type for your campervan is as important as choosing the right wattage. A panel that doesn’t suit your roof, installation skills, or usage pattern will underperform regardless of its output rating. The three main types serve different needs, and understanding the genuine trade-offs between them prevents an expensive mistake.
Rigid vs Flexible vs Portable Solar Panels: At a Glance
| Rigid | Flexible | Portable | |
| Efficiency | 19–22% | 16–20% | 19–22% |
| Real-world output vs rated | 95–100% | 85–90% | 95–100% |
| Weight (100W) | 5–7 kg | 1.5–3 kg | 3–5 kg (folded) |
| Lifespan | 25+ years | 5–15 years | 5–10 years |
| Installation | Mounting brackets or roof rack | Adhesive, no drilling | No installation required |
| Best suited to | Full-time van life, maximum output | Curved roofs, stealth camping | Weekend use, flexibility |
| Indicative cost (100W) | £80 to £120 | £100 to £160 | £120 to £250 |
Rigid Solar Panels for a Campervan
Best for: Full-time van life, maximum year-round output, vans with flat or near-flat roofs, and roof bars or racks already fitted.
Not ideal for: Vans with curved roofs, anyone who wants to avoid drilling, and installations where weight is a significant constraint.
Rigid solar panels are the default choice for most full-time UK van lifers looking for an off-grid solar system. They’re mounted on an aluminium frame raised slightly above the roof surface on brackets or a roof rack, and that air gap matters more than most buyers realise.
Research shows that PV panel performance degrades as operating temperature increases. Air circulating beneath the panel keeps it cooler, and cooler panels are more efficient. A panel running at 25°C produces approximately 10-20% more output than the same panel running at 45-55°C, which is what a bonded-down panel can reach on a warm summer day.
Panels in the motorhome market are predominantly rigid monocrystalline, and they’re the right default choice for a fixed installation. A 200W rigid panel typically measures around 1.4 x 0.7 metres. Plan your roof layout before purchasing to confirm you have the space for the output you need.
Flexible Solar Panels for a Campervan
Best for: Curved roofs, stealth camping, anyone who doesn’t want to drill, weight-sensitive builds.
Not ideal for: Full-time van life, where maximum long-term output is the priority; very hot climates, where heat build-up will significantly suppress output.
Flexible solar panels are thinner, lighter, and can be bonded directly to a curved roof surface using adhesive tape or Eternabond without drilling a single hole. For example, the Renogy 200W flexible panel is bendable up to 240° and weighs approximately 50% less than an equivalent rigid panel. This is a significant weight saving when you’re already carrying everything you need to live on the road.
The trade-off is real and worth quantifying. Flexible panels degrade faster than rigid panels because the bending stress on the cells over time causes micro-cracks, and they’re harder to cool. Air can’t circulate under a bonded flexible panel the way it can under a raised rigid mount.
In practice, a flexible 200W panel bonded flat to a van roof will realistically produce 85 to 90% of its rated output, compared to 95 to 100% from a rigid panel mounted with an air gap. Over a full year under UK conditions, that 10-15% real-world gap adds up.
For van conversions with curved fibreglass or composite roofs, such as classic VW campervans, Ford Transit customs, and similar, where a rigid panel’s frame won’t sit flat, flexible panels are often the only practical choice. They’re also popular for stealth camping, where a low-profile roof with no protruding brackets or frames is a priority.
Portable and Foldable Solar Panels for a Campervan
Best for: Weekend and occasional van users, anyone not ready to commit to a permanent installation, or a supplementary boost to a fixed rooftop system.
Not ideal for: Full-time van life, where daily setup and storage become impractical, high-wattage systems, where carrying multiple foldable panels becomes cumbersome.
Portable solar panels fold down into a compact case and plug directly into a battery, charge controller, or portable power station via a standard connector, meaning no installation, drilling, or commitment. A portable 100W panel can fold down to the size of a large briefcase, often comes with USB ports for direct phone charging, and works well paired with Jackery or EcoFlow power stations.
The key advantage of portable panels over fixed rooftop panels is the ability to adjust their angle. You can point a portable panel directly at the sun, regardless of your van’s direction. This recovers the angle inefficiency that a fixed rooftop panel suffers whenever the van isn’t perfectly oriented. On a sunny day, an angled portable panel can genuinely outperform a flat-mounted rooftop panel of the same wattage.
The limitation is practicality. Setting up a portable panel every time you want to generate power, keeping it in the sun while you move around the site, and storing it safely when driving adds friction that fixed panels don’t have. For weekend van users who spend most of their time parked in one spot, that friction is manageable, and the flexibility is valuable. For full-time van lifers constantly on the move, a fixed system is almost always the more practical long-term choice.
Solar Panels Technology for a Campervan: Monocrystalline, Polycrystalline and CIGS
The technology inside your solar panel determines how efficiently it converts sunlight into electricity, how it performs in the UK’s frequently overcast conditions, and how long it will last on a van roof.
Monocrystalline Solar Panels for a Campervan
Best for: All fixed campervan installations. The correct choice for the vast majority of UK van builders.
Monocrystalline panels are manufactured from a single, continuous crystal of silicon. The crystal structure is uniform, allowing electrons to flow through it with minimal resistance, which is what produces the higher efficiency figures. Monocrystalline panels achieve 20 to 23% efficiency, compared to 15 to 17% for polycrystalline.
For a campervan, where roof space is limited, and you need maximum output from the smallest possible area, that efficiency advantage is decisive. A 200W monocrystalline solar panel for a campervan is comparatively smaller, lighter, and more reliable than a 200W polycrystalline panel, meaning you get the same output from a panel that takes up less roof space and adds less weight.
Monocrystalline panels also perform better in diffuse and low-light conditions than polycrystalline panels. This is a genuine advantage in the UK, where many days are cloudy rather than sunny. They carry the longest warranties (typically 25 years on power output) and degrade more slowly, losing approximately 0.5% of output per year over their lifespan. For any UK campervan application, monocrystalline is the right default choice.
Polycrystalline Solar Panels for a Campervan
Best for: Budget situations where cost is the absolute priority and roof space isn’t constrained. Otherwise, always choose monocrystalline.
Polycrystalline panels are manufactured from multiple fragments of silicon melted and formed together rather than grown as a single crystal. The resulting cell structure is less uniform, which is why efficiency is lower. The 15 to 20% efficiency difference between mono and poly means that a polycrystalline panel needs to be 15 to 20% larger to produce the same wattage as a monocrystalline panel.
In the early days of solar, polycrystalline modules justified their existence with lower cost. That price gap has nearly closed in 2026. Monocrystalline costs just £0.05 per watt more than polycrystalline, making polycrystalline’s only remaining advantage essentially irrelevant.
If you encounter a polycrystalline panel in a budget kit, it’s not a disaster. It will still generate power, but if you’re buying panels specifically for a campervan, choose monocrystalline. The minimal cost saving doesn’t justify the larger footprint, lower efficiency, and inferior low-light performance on a van roof in Britain.
CIGS Thin-Film Solar Panels for a Campervan
Best for: Campervans with compound curved roofs, buyers prioritising low-light performance over peak efficiency, and weight-critical builds.
Not ideal for: Flat or gently curved roofs where monocrystalline delivers better output at lower cost.
CIGS stands for Copper Indium Gallium Selenide, which is the semiconductor material used in this category of thin-film solar panel. CIGS is a technology specific to flexible solar panels, consisting of cells made from copper, indium, gallium and selenium. The resulting panel is extremely thin, lightweight, and genuinely conforms to curved surfaces in a way that silicon-based flexible panels, which achieve flexibility through thin silicon cells, cannot fully match.
The key practical advantage of CIGS in a UK van context is its performance in diffuse and low-angle light. CIGS panels maintain a higher proportion of their rated output in overcast conditions compared to silicon panels. This is a real benefit in Britain, where diffuse light conditions account for a significant proportion of annual solar exposure.
The trade-off is efficiency. CIGS panels typically achieve 12 to 14% efficiency, which is lower than monocrystalline silicon but is closing the gap in real-world UK conditions relative to the headline STC figures. They’re also more expensive per watt than equivalent silicon panels and not as widely available through mainstream UK retailers.
CIGS is worth considering for campervans with significantly curved roofs, such as the compound curve found on older VW campervans or fibreglass motorhome bodies, where even flexible silicon panels can’t conform cleanly. For flat or gently curved roofs, monocrystalline rigid or flexible panels are the more practical choice.
Campervan Solar Charge Controllers: MPPT vs PWM Explained
A charge controller is not optional. It sits between your solar panels and your battery, regulating the voltage and current flowing between them. Without it, your panels would push unregulated voltage directly into the battery, overcharging and permanently damaging it within days. Every campervan solar system needs one, and the type you choose makes a significant difference to how much of your panel’s output actually ends up stored in your battery.
What Does a Charge Controller Do?
Your solar panel produces a variable voltage depending on light intensity, temperature, and shading. Your battery needs a specific, carefully controlled charging profile to charge efficiently and safely, without damage. The charge controller continuously monitors both sides and adjusts the current accordingly.
It cuts output when the battery is full, applies a boost charge when needed, and prevents reverse current from draining the battery through the panel at night. Think of it as the intelligent manager of your solar system. Your panels generate the power, and the battery stores it. The charge controller decides how that transfer happens, protects both sides from damage, and, if it’s a good one, extracts every watt of available power in the process.
PWM Charge Controllers Explained
PWM stands for Pulse Width Modulation. It’s the older and simpler of the two technologies. A PWM controller works by gradually reducing the charging current as the battery approaches full, switching the connection between the panel and battery on and off very rapidly, thousands of times per second, to control the power flow.
The limitation of PWM is fundamental to how it works. A PWM controller forces the solar panel to operate at the battery’s voltage rather than the panel’s own optimal voltage. A 100W panel optimised to operate at 18V, being forced down to a 12V battery voltage, loses roughly 33% of its potential output before a single photon has been converted to stored electricity. In full, direct sun, that loss is significant, and in the diffuse, low-intensity light that characterises most UK days, it’s worse.
PWM controllers are cheap, typically £10-£25. and they work adequately for very small systems (under 20W) or truly budget-constrained builds where the cost of the controller represents a significant proportion of the total system budget. For any UK campervan system with a 100W or more panel, PWM is a false economy.
MPPT Charge Controllers Explained
MPPT stands for Maximum Power Point Tracking. An MPPT controller continuously measures the panel’s current and voltage output across a range of operating points and finds the specific voltage at which the panel produces maximum power, or the maximum power point. It then converts the higher panel voltage down to the battery charging voltage, converting the excess energy into current that flows into the battery.
Using the latest ultrafast MPPT technology, an MPPT controller can produce up to 30% greater energy yield than PWM controllers and as much as 10% more than slower MPPT controllers. In UK conditions, where cloud cover means the panel’s maximum power point shifts constantly as light intensity changes, tracking speed matters. A slow MPPT controller chasing a moving target in variable British light will significantly underperform a fast one.
The 10-30% efficiency advantage of MPPT over PWM translates directly into more energy stored per day from the same panel. On a system with a 200W panel generating 400Wh on a reasonable UK day, an MPPT controller recovering 25% more than a PWM adds approximately 100Wh per day. This is enough to keep a phone charged, run LED lighting for several hours, or meaningfully extend your battery reserves before you need to recharge.
MPPT vs PWM Compared:
| PWM | MPPT | |
| How it works | Connects panel directly to battery | Tracks panel’s optimal voltage, converts to battery voltage |
| Efficiency advantage | Baseline | 10–30% more energy from same panel |
| Best for | Systems under 20W, extreme budgets | All systems 100W and above |
| UK conditions performance | Poor in diffuse light | Strong. It tracks changing light constantly |
| Typical cost (UK) | £10 to £25 | £50 to £200+ |
| Recommended for campervan? | No, except for tiny systems | Yes |
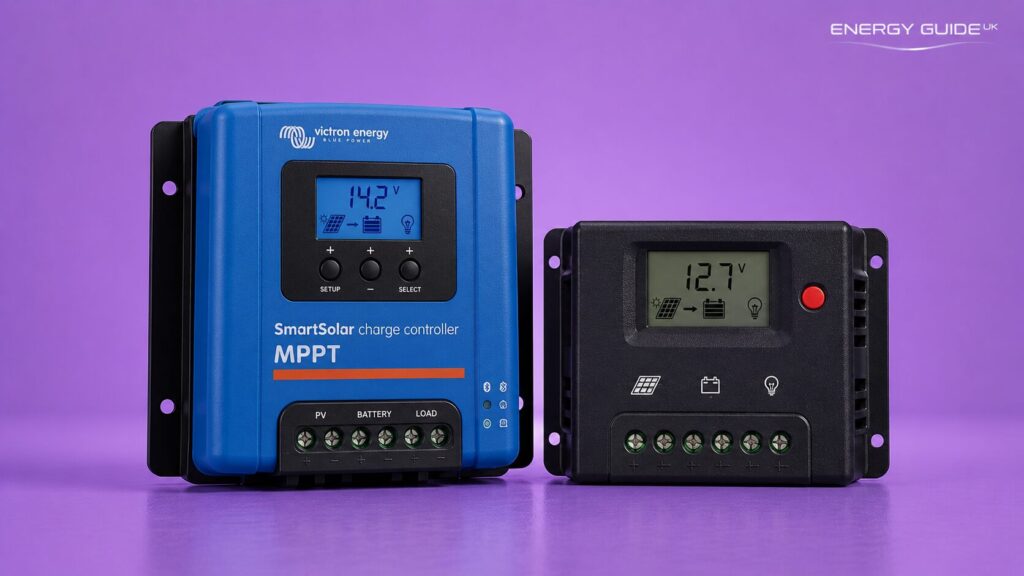
Recommended MPPT Controllers for UK Campervans
Victron SmartSolar MPPT 75/15 — Best for Most Van Builds
- Specification: 75V max panel voltage, 15A max charge current, 220W max panel power (12V system), built-in Bluetooth, compatible with all battery types.
- Price: From ~£50
The Victron SmartSolar 75/15 starts from £50.50 in the UK, achieves peak efficiency of 98%, features built-in Bluetooth for real-time monitoring via the VictronConnect app, and handles panels up to 220W on a 12V system. It’s compatible with all battery types, including LiFePO4, AGM, and gel, and its automatic 12/24V selection removes one potential setup error for first-time installers.
For a single 200W panel on a 12V system, this is the right controller. It’s from the same manufacturer as the Victron panels, but it works equally well with Renogy, ECO-WORTHY, or any other panel brand. Charge controllers and panels don’t need to be from the same manufacturer.
Renogy Rover 20A MPPT — Best Budget MPPT
- Specification: 100V max panel voltage, 20A max charge current, 260W max panel power (12V system), LCD, compatible with most battery types.
- Price: From ~£60
The Renogy Rover 20A is the value alternative for builders who want MPPT performance without the Victron price tag. At around £55 to £70, it handles up to 260W on a 12V system and includes a built-in LCD showing real-time charging data without requiring a smartphone or app.
It’s a solid controller that Renogy has refined over multiple iterations, and it’s reliable, well-supported, and widely used in UK van conversions. The trade-off versus Victron is primarily in the quality of the tracking algorithm and the ecosystem integration.
The Renogy Rover works well as a standalone controller. The Victron SmartSolar’s Bluetooth and VRM integration becomes genuinely valuable if you’re building a more complete monitored system. For a simple, self-contained van solar setup, the Renogy Rover does the job effectively at a lower price.
Sizing Your Charge Controller
Your charge controller must be rated to handle the maximum current your panel array can produce. The rule is straightforward: your controller’s max charge current rating must exceed your panels’ combined short-circuit current (Isc) by at least 25%.
For a single 100W 12V panel with an Isc of approximately 6A: 6A × 1.25 = 7.5A minimum. A 10A controller provides adequate headroom.
For a single 200W 12V panel with an Isc of approximately 11A: 11A × 1.25 = 13.75A minimum. A 15A or 20A controller is correct. For two 200W panels in parallel (400W total): 22A × 1.25 = 27.5A minimum. A 30A controller is required.
Check your panel’s Isc figure on the specification label or data sheet. It’s always listed alongside Voc and Vmp. Never undersize your controller to save money: an undersized controller running at its current limit continuously will overheat and fail prematurely.
Solar Panels Kit for a Campervan: Are They Worth Buying?
A solar kit bundles the panel, charge controller, cables, MC4 connectors, and sometimes mounting hardware into a single purchase. For a first-time van builder, the appeal is obvious. It’s one order, one delivery, matched components, and a single instruction document covering the whole system.
For an experienced builder sourcing components individually, a kit rarely represents the best value. Understanding which category you fall into saves money and prevents you from purchasing a kit that includes components you don’t want or need.
What a Good Campervan Solar Kit Should Include
- Solar panel(s) — monocrystalline, specified wattage, with warranty documentation
- MPPT charge controller — not PWM. If the kit lists a PWM controller, treat this as a red flag and either choose a different kit or budget separately for an MPPT upgrade.
- MC4 connector cables — pre-terminated solar cables of sufficient length for your installation
- Appropriately rated cable — minimum 6mm² for runs up to 3 metres from a 100W panel; 10mm² for longer runs or higher wattage
- Inline fuse or fuse holder — to protect the cable between the battery and the controller
- Mounting hardware — Z-brackets for rigid panels or adhesive/bonding compound for flexible panels
A kit that omits the fuse, provides undersized cable, or includes a PWM controller is not a complete kit, regardless of what the listing claims. Check the specification details before purchasing, not after.
When Buying Components Separately Is Better
If you’re confident enough to source components individually, you’ll typically save 15 to 25% versus a bundle and get to choose better-specified components for each function.
The case for buying separately is strongest when:
- You already have an MPPT controller or a leisure battery from a previous build
- The kit’s panel wattage doesn’t match your calculated requirement
- The kit includes a PWM controller, and you’d need to replace it anyway
- You want a Victron controller paired with a Renogy or ECO-WORTHY panel, which is a combination no kit offers, but one that many experienced van builders choose.
- You’re building a larger system (400W+), and no single kit covers the specification.
The case for a kit is strongest when you’re building your first solar system, want the reassurance of matched components, and value the simplicity of a single order with a single instruction set. For most first-time UK van builders with a 200W requirement, a quality kit with an MPPT controller is a perfectly sound starting point.
Final thoughts on the Best Solar Panels for a Campervan
Getting the best solar panels for a campervan isn’t complicated, but it does require thinking through the system as a whole rather than starting and ending with the panel. The panel is the most visible component and the one that gets the most attention. Still, it’s the charge controller, battery, and wiring that determine whether the panel’s output actually becomes usable power when you need it.
The single most important shift for any UK van builder is sizing the system on real-world British output rather than the wattage printed on the panel. A 200W panel in the UK in January generates 40 to 100Wh on a typical day, not 200Wh. Plan around that figure, and your system works year-round.
For most UK campervans, the right starting point is 200W of monocrystalline rigid panel, a Victron SmartSolar MPPT controller, and a 100Ah LiFePO4 battery. That combination covers a fridge, lighting, phone and laptop charging throughout a UK summer and provides a solid foundation for expansion if your power needs grow.
For full-time van life or year-round UK use, 400W of panels with a 200Ah LiFePO4 battery gives you genuine energy independence across most British weather conditions, with alternator charging via a DC-DC charger bridging the gap on short winter days.
FAQs on Solar Panels for A Campervan
What Are the Most Efficient Solar Panels for a Campervan?
Monocrystalline N-Type solar panels are currently the most efficient for campervans, with the Renogy N-Type 200W achieving 25% cell efficiency. For portable use, the Jackery SolarSaga 100W Bifacial achieves up to 24% efficiency using bifacial monocrystalline cells that capture reflected light from below as well as direct sunlight above. Monocrystalline panels of any kind outperform polycrystalline in the diffuse light that characterises British weather for the majority of the year.
What Is the Best Solar System for a Camper?
For most UK campervans used for extended trips, the best system is 200W of rigid monocrystalline panel paired with a Victron SmartSolar MPPT 75/15 charge controller and a 100Ah LiFePO4 leisure battery. This combination covers a 12V compressor fridge, LED lighting, phone and laptop charging in UK summer conditions, generates approximately 800 to 1,200Wh per day in good light, and gives you around two days of battery reserve before solar input is needed.
How Long Will It Take a 400W Solar Panel to Charge a 100Ah Battery?
In UK summer conditions, averaging 3.0 peak sun hours per day, a 400W panel generates approximately 1,200Wh per day through an MPPT controller at 95% efficiency, giving you around 1,140Wh of usable charge per day. A 100 Ah LiFePO4 battery at 12.8V holds approximately 1,280 Wh of usable energy. Starting from empty, a 400W panel in UK summer sun would fully charge a 100Ah LiFePO4 battery in approximately 1.1 to 1.5 days of average sun, or in a single day of above-average sun.
How Many Solar Panels Do I Need for a Campervan?
It depends entirely on your daily power consumption. A weekend van with phone charging, LED lighting, and a small cool box typically needs one 100W or 150W panel. A van with a 12V compressor fridge, laptop, and lights needs one or two 100-200W panels. Full-time UK van life with multiple appliances and year-round use typically requires at least 400W.
How Long Does It Take to Charge a Campervan Battery with a 100W Solar Panel?
A 100W solar panel in UK summer conditions (averaging 3.0 peak sun hours per day) generates approximately 285Wh per day through an MPPT controller at 95% efficiency. A 100 Ah LiFePO4 battery stores approximately 1,280 Wh of usable energy. Starting from empty, a 100W panel in UK summer would fully charge a 100Ah LiFePO4 in approximately 4.5 days of average summer sun. For a 100Ah AGM battery with 50Ah of usable capacity (640Wh), the same panel would fully charge it from empty in approximately 2.25 summer days.
How Much Does It Cost to Fit a Solar Panel to a Campervan?
A professionally supplied and installed 100W panel system with an MPPT controller on a standard campervan costs approximately £420-£595, including components and labour. A 200W system, professionally installed, ranges from approximately £595 to £800, depending on the installer and component specifications. For DIY installation, the total component cost for a 100W panel, MPPT controller, 100Ah AGM battery, cabling and hardware is approximately £255 to £280, or £345 to £575 for a 200W panel with a 100Ah LiFePO4 battery.
Are Solar Panels on Caravans Worth It?
Yes, for the vast majority of caravan users who spend more than a few nights per year off-grid or on sites without electric hookups. The payback case is straightforward: a UK motorhome can reduce annual hookup fees from approximately £600 to under £80 per year after installing solar, recovering the full system cost within three years. For a caravan used exclusively on electric hookup and rarely moved off-grid, the payback takes longer, and the case is weaker. Still, the convenience of a battery maintained between trips, the freedom from hookup dependency for spontaneous stops, and the reduced site fees represent genuine value for most touring caravanners.
Sources and References
- Department for Energy Security and Net Zero – Solar photovoltaics deployment
- Environmental Science and Pollution Research – Review of cooling techniques used to enhance the efficiency of photovoltaic power systems